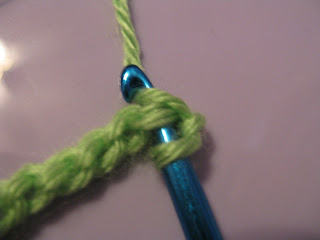
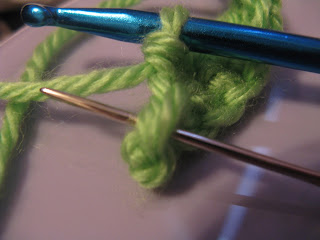
In three steps, this is how to work a single crochet:
- Insert hook into next stitch [or space]
- Draw up a loop (2 loops on hook)
- Yarn over and draw through two loops to complete
If that doesn't do it for you, then on to the pictures! As always, you can click the pictures to enlarge them if you need a better view. (Left-handers, either reverse my pictures or work while looking in a mirror, either should work.)
To begin, chain the desired number of stitches, plus one. Here is mine, ten chains long:
Take a good look at your chain. The front looks like a row of Vs all stacked inside each other.
These "back bumps" are what I like to work into when working into my starting chain, since it leaves the nice Vs on the other side visible.
To start, insert your hook into the second chain stitch from bottom to top, under the back bump. The loop on your hook does not count as a stitch, and the first chain stitch is your "turning chain". In the first picture below, my yarn needle shows where to place your hook.
Step Two: Draw up a loop
Now you need to "yarn over", which means wrap your yarn around your hook in a counter-clockwise direction. In this case, that means lay the yarn over the hook from right to left.
Pull this yarn through just the chain stitch. It helps to tip your hook so that it catches the yarn, making it easier to pull through the stitch.
Now you should have two loops on your hook.
Step Three: Yarn over and pull through two loops to complete
Lay your yarn over the hook from right to left again... (Notice that this means you have to wrap it under the hook first)
...and pull that yarn through the two loops on your hook to finish the stitch!
To continue, start over at Step One, insert your hook into the next stitch. The loop you've just worked into will stretch, so pay attention and make sure you aren't working into the same stitch more than once. In the picture below, my yarn needle marks the next stitch to work into.
Continue following these three steps all the way across the row. You should end up with one single crochet less than the number of chain stitches you worked (I worked 10 chain stitches, so I ended up with 9 single crochet stitches).
When you reach the end of the row, you must turn and go back again. Crochet is always worked right to left. But before you can turn, you need to work 1 chain stitch as your turning chain. Yarn over, and draw through the one loop on your hook.
Now turn your work so the hook is sitting at the top of the righthand side. You'll be looking at the backs of your stitches.
If you look at the top of your work, there should be a row of Vs, just like with the chains. The difference between working into a starting chain and working into the stitches of a previous row is that instead of picking up only one loop, you'll be picking up two. In Step One, you'll insert your hook under both loops of the stitch. Remember not to work into your turning chain, but the last stitch worked on the previous row. Again, my yarn needle indicates the next stitch to work into in the picture below.
Steps Two and Three are done exactly the same way.
Continue working across the row, inserting your hook into both loops of each stitch for Step One.
When you reach the end of the row, make sure you don't miss the last stitch. It can be a little tricky to spot. If there's still a bunch of yarn to the left of your hook when you stop, you're probably missing the last stitch.
Count your stitches at the end of each row when you're first starting out, to make sure you haven't missed any, or picked up any new ones. Remember to chain one at the end of each row to move up to the next one.
There you go! This is what my swatch looks like after four rows.
Now go out there and make something cool!


No comments:
Post a Comment
Feel free to leave comments: I love hearing from you!